• Skip to primary navigation
  • Skip to main content
  • Skip to primary sidebar
  • Skip to footer
Desert Chica
  • DIY & Crafts
    • DIY
    • Crafts
    • Cricut Projects
    • Disney Crafts
    • All Crafts & DIY
  • Travel
    • Arizona
    • Theme Parks
    • California
    • Disney Parks
    • All Travel
  • Food
    • Instant Pot
    • Party Food
    • All Food
  • Costumes
    • DIY Costume
    • Disney Costumes
    • Costume RoundUps
    • Join Our Costume Group
Desert Chica

Desert Chica

Southern Arizona Blogger

  • DIY & Crafts
    • DIY
    • Crafts
    • Cricut Projects
    • Disney Crafts
    • All Crafts & DIY
  • Travel
    • Arizona
    • Theme Parks
    • California
    • Disney Parks
    • All Travel
  • Food
    • Instant Pot
    • Party Food
    • All Food
  • Costumes
    • DIY Costume
    • Disney Costumes
    • Costume RoundUps
    • Join Our Costume Group

DIY Memory Display Board

This site contains affiliate links. Please see policies for more information. Thanks for supporting Desert Chica.

August 28, 2017 · Karen · 1 Comment

Sharing is caring!

28 shares
  • Share
  • Tweet

After some much-needed spring cleaning (read: complete gut job), I had a little fun decorating my office space. I already owned a few fun accessories that were buried under papers and craft supplies that I could dust off and showcase but I wanted something new for my wall. Peter ended up making me an adorable DIY Memory Display or hanging art boards perfect for letting me rotate my favorite pictures and mementos.

Create your own DIY Memory Display or Art Board perfect for hanging mementos and photos on a budget. Utilize materials on hand to keep it budget friendly.

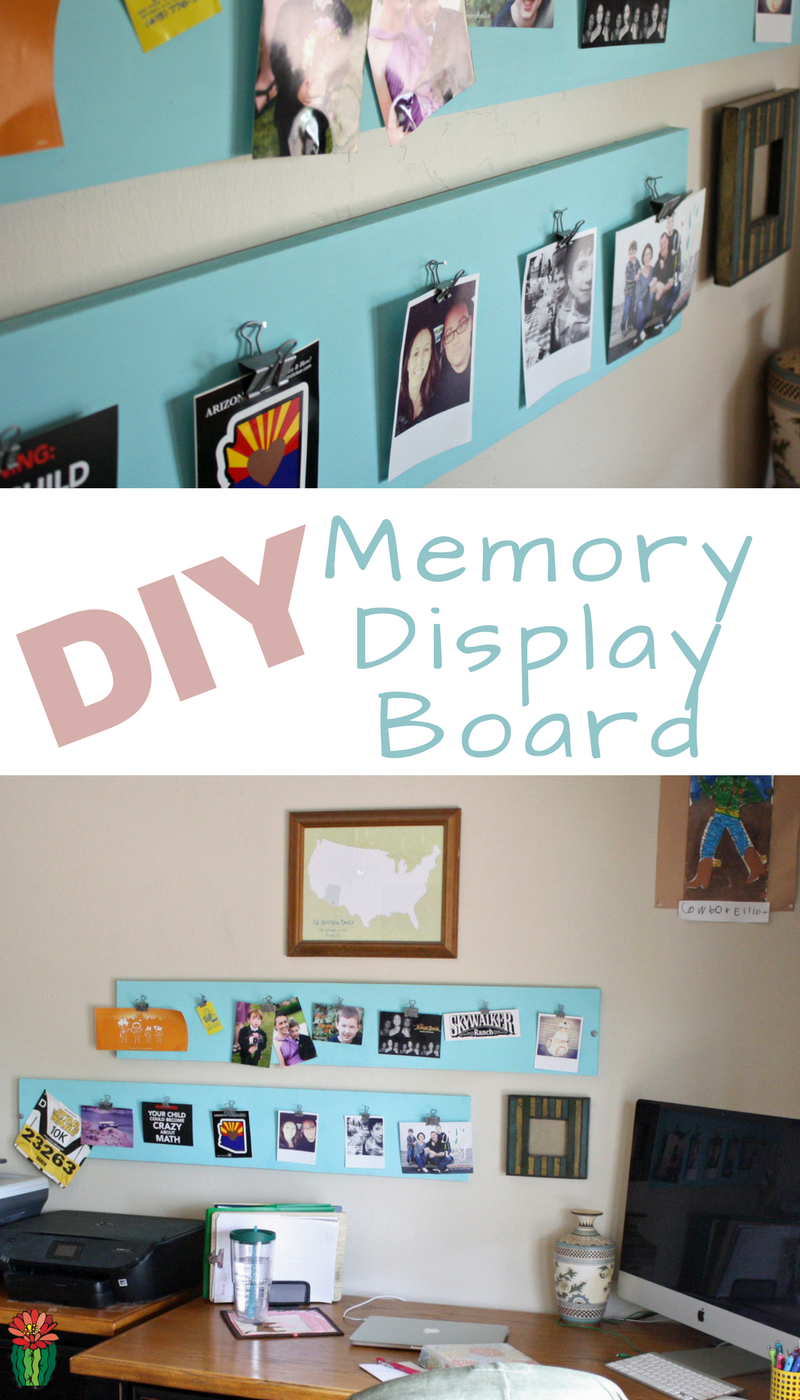
The project is rather simple and we utilized leftover materials we had on hand to keep the project budget friendly.

DIY Memory Display Board Supplies

  • MDF boards
  • Paint & Primer
  • Small Nails
  • Toggle Bolts
  • Binder Clips

Peter cut a piece of MDF in half, and then primed and painted it. It wasn’t my dream color, not that I had one in mind but it was pretty enough. Pretty enough that I had bought it on clearance and stashed it away for a fun future project.

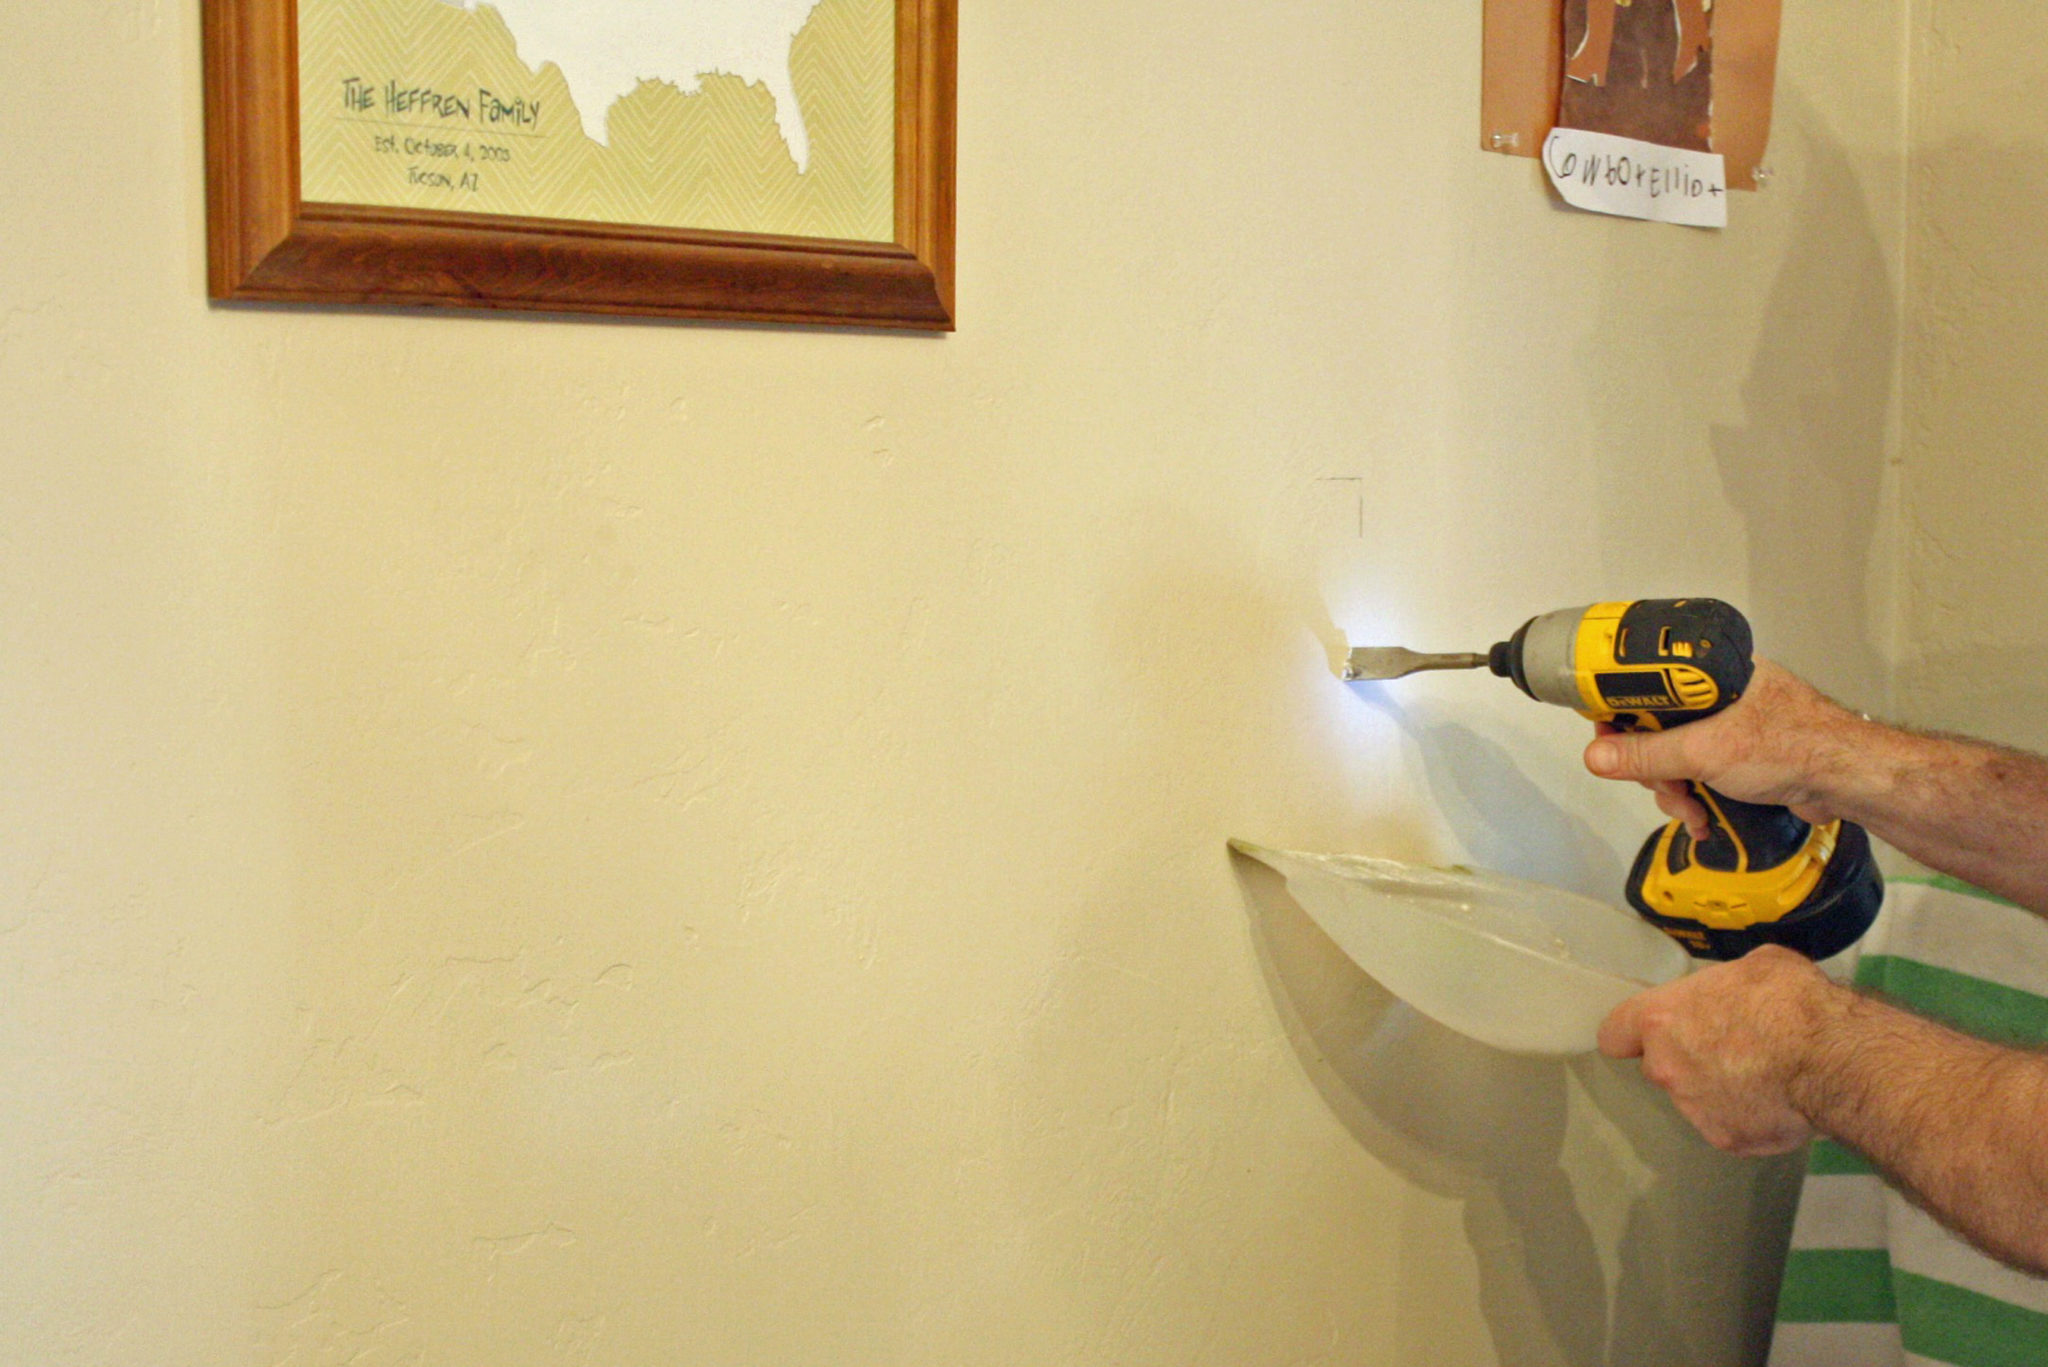
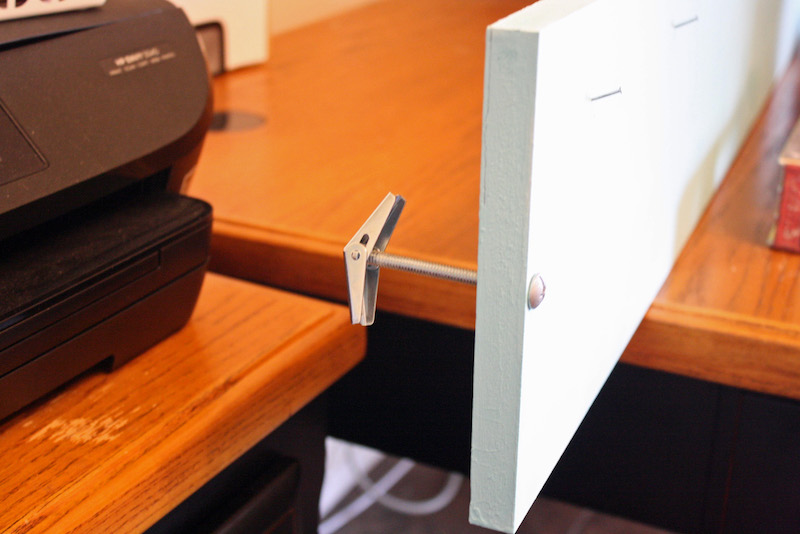
The boards were installed using heavy duty toggle bolts because we couldn’t install the boards on studs. If you want to minimize the dry wall mess when drilling, just hold a dustpan underneath it.

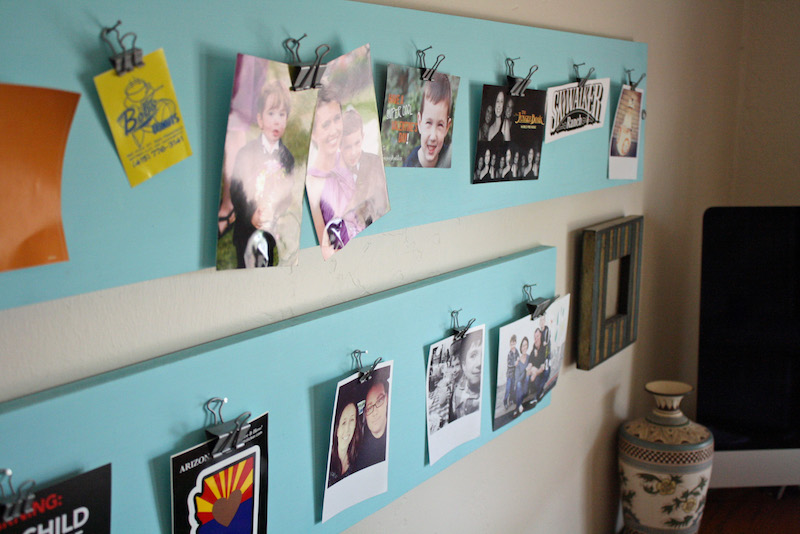
We used small nails evenly spaced across our board to hang the binder clips on. There are lots of really pretty binder clips available online but I opted to keep the project budget friendly so we just spray painted the regular ones I had and made them a pretty matte silver.

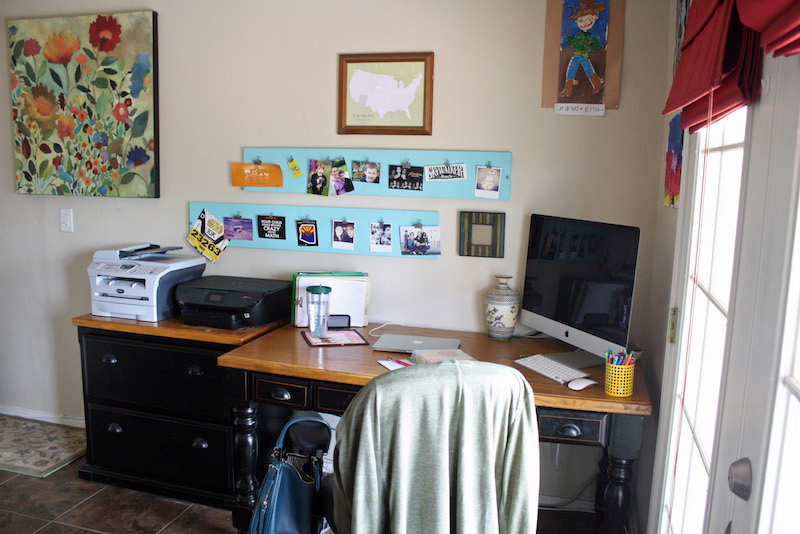
This project turned out super cute. It really helped create a pretty new space in my office for me to display fun pictures and mementos. I wanted to share this project even though it was fairly simplistic as a reminder that DIY projects and improvements don’t have to expensive or complicated.

DIY

Previous Post: « Should Kids See The Blue Man Group?
Next Post: Vampire Donuts »

Reader Interactions

Leave a Reply Cancel reply

Your email address will not be published. Required fields are marked *

This site uses Akismet to reduce spam. Learn how your comment data is processed.

Primary Sidebar

Hi! I’m Karen.

I'm a mom to two boys, Arizona native, and travel lover. Desert Chica is my place to share a peek into our life and the easy and inexpensive costumes, crafts and desserts I like to make. “If I can do it, anyone can!” Learn more about me here.

  • Facebook
  • Instagram
  • Pinterest
  • Twitter
  • YouTube

Footer

  • Facebook
  • Instagram
  • Pinterest
  • Twitter
  • YouTube

Amazon Disclosure: As an Amazon Associate I earn from qualifying purchases.

  • About Karen
  • Policies
  • Contact Me!
  • In The Press

Copyright © 2025 · Recipe Blogger Theme · Genesis Framework · Privacy Policy · WordPress · Log in

28 shares