
Quinn came home with a super fun project in honor of Rodeo Break. He needed to make a hobby horse, aka DIY stick horse to ride during the kindergarten rodeo parade.

I couldn’t wait to get started on this project. I found some fun inspiration on Pinterest and created this easy DIY sock horse tutorial, no sewing machine necessary!
Stick Horse With Dollar Tree Supplies
Most of supplies can be found at a dollar store. I started by taking stock of what I already had at home and found yarn, filling from an old pillow, a zip tie and a glue gun.
Then I headed to the Dollar Tree to pick up a few more things including a mop, handkerchief, pair of socks, felt squares, electrical tape, googly eyes and twine. The mop was really only $1, it wasn’t the sturdiest mop but it was perfect for this project.

DIY Stick Horse
I unscrewed the mop head off of the handle and wrapped the handle in black electrical tape. While I worked on that, Quinn removed all the mop strands out of the mop head.
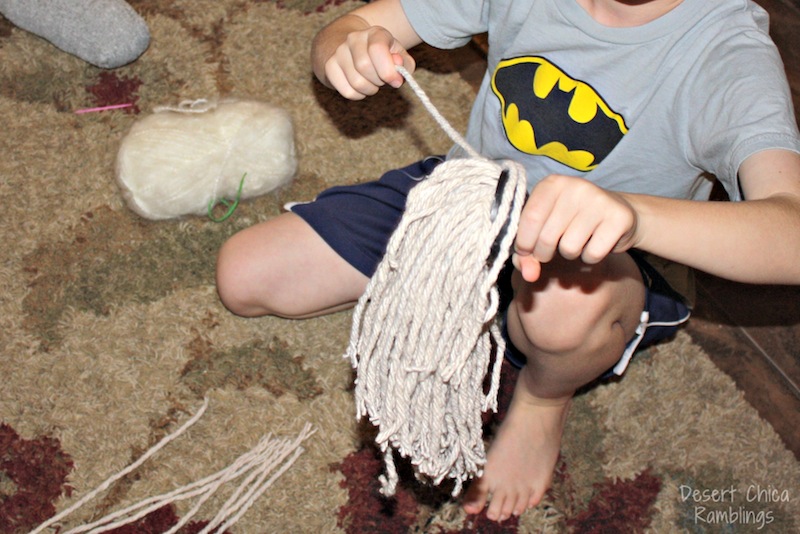
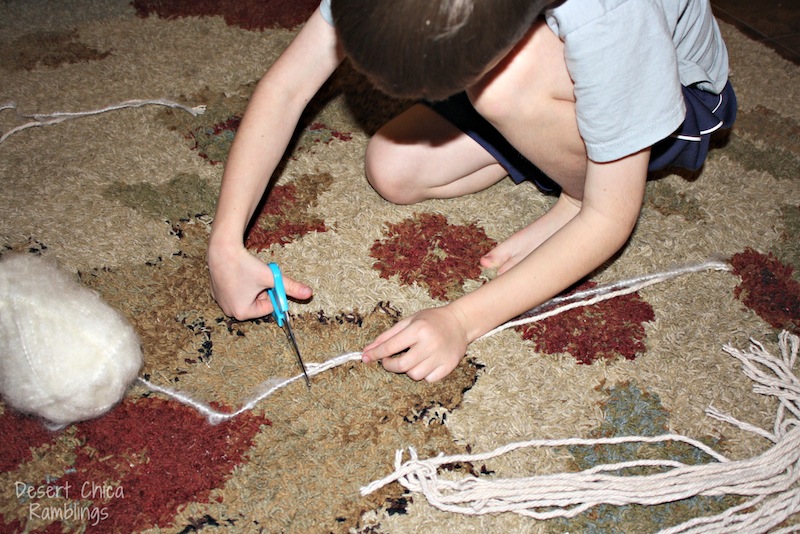
Next we cut and measured an equal number pieces of yarn, The yarn we used was rather expensive for our simple project but it was the only skein I had on hand in a neutral color. I had no current plans for it and wanted to use as many supplies on hand as possible. So our horse has “fancy” yarn hair and “cheap” mop hair. 😉
The mop provided a stick for the stick horse and hair for the horse head. Yarn and another long random stick could substitute if you don’t find a cheap mop.

How to make a stick horse
Skip the wooden horse head and make a sock filled head instead. Using a sock makes it easy to customize the color of your stick horse too, make a brown stick horse or a pink one!
Then we stuffed the sock tightly with old pillow filling. We filled most of the sock but left some empty space at the end to stick the mop handle in.
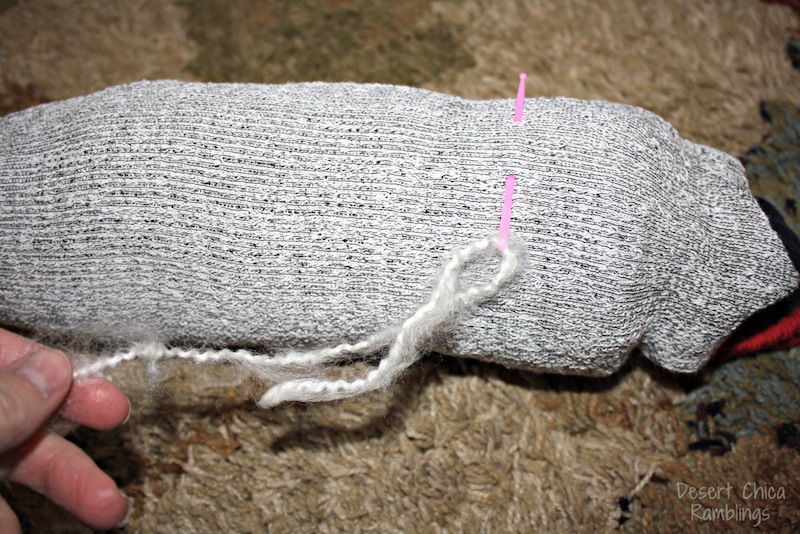
To add the hair I threaded the yarn into a large plastic needle we had on hand and poked it the yarn through the sock from the middle to heel of the sock.

Then we placed the matching mop strand perpendicular across the yarn strand and then tied the yarn over the mop strand. Finally we tied the mop strand over the first knot.
It’s a very simply hair system that doesn’t require any true sewing or hot glue. We kept adding hair and ended up using 30 pairs of yarn and mop hair to get a good horse mane.
Quinn attached most of our hair so it wasn’t really in a straight line, but it didn’t really matter. I filled in a few strands at the end and the mane turned out great.

Horse Head on a Stick
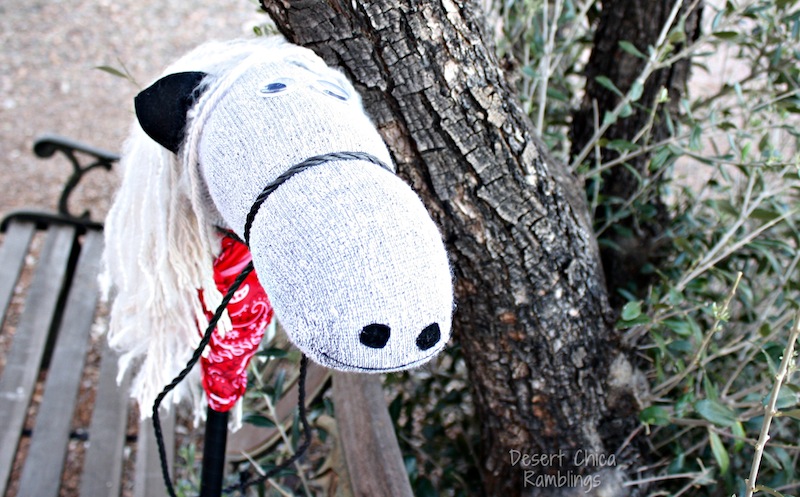
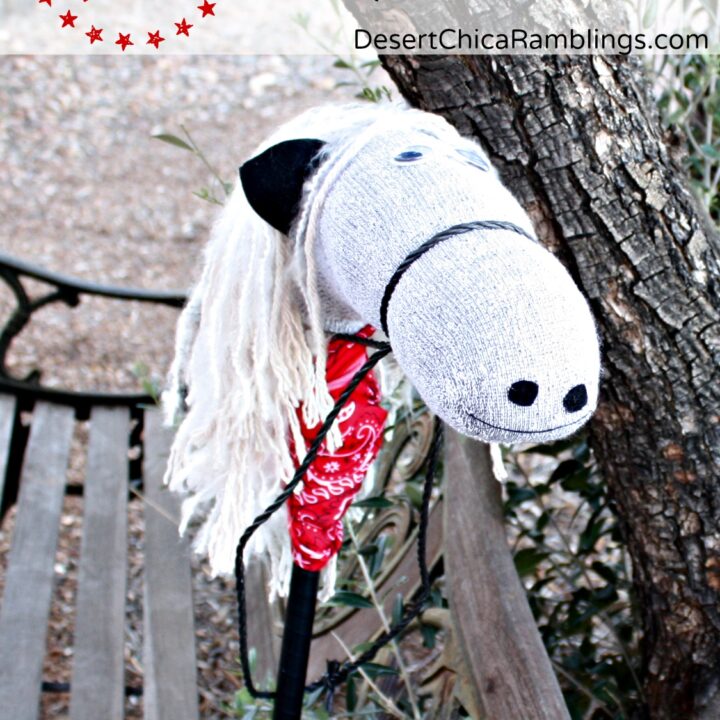
I used a hot glue gun to attach googly eyes and small black felt circles for the nostrils. Then I doubled black thread and made one long stitch to create the mouth.
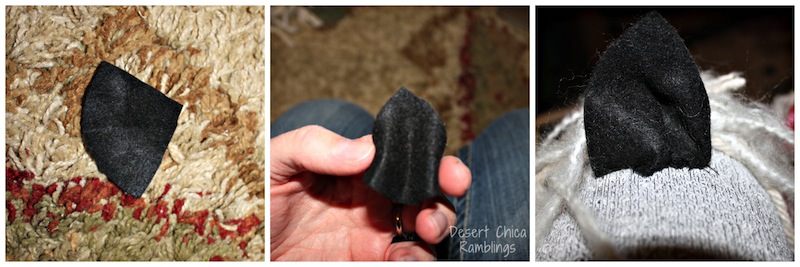
I cut 2 quarter circles out of felt to create the ears. My first set were too small, so I had to try again. It really depends on the size of you sock horse and preference. I lightly pinched the felt together while sewing a couple of simple stitches to attach the ears to the head.
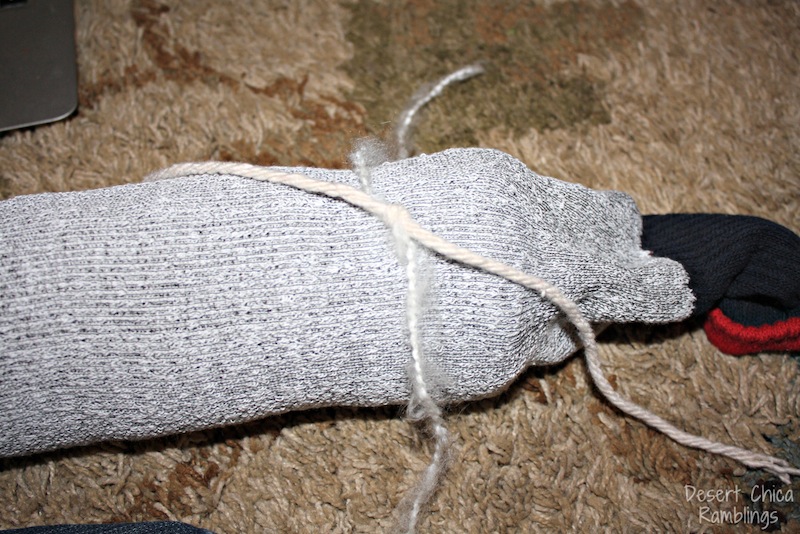
I pushed the end of the mop handle into the sock to attach the head. After adjusting the stuffing around it, I used a zip tie to attach the sock to the handle. I covered the zip tie by adding the handkerchief to the horse. That way he is clearly a cowboy horse. 🙂
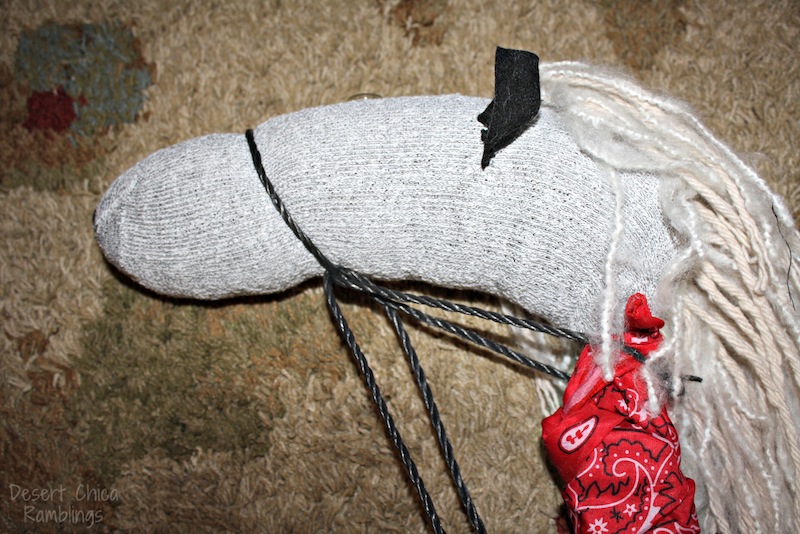
I used two pieces of twine to create the horse bridle. The first one was tied tightly from the nose to the handle, pulling the nose down a little bit. The second piece of twine was attached from the from the bridle to the stick to look like a set of reins.
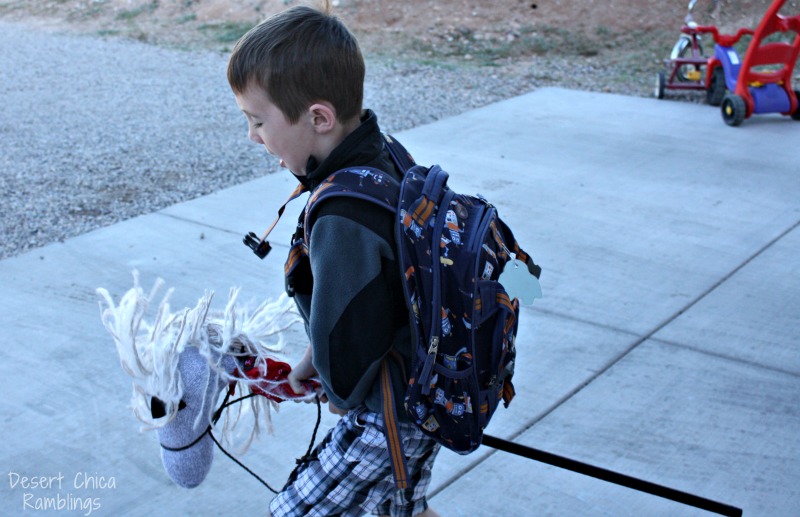
Quinn loved his new stick horse and can’t wait to ride it in the rodeo parade next week. These simple sock stick horses would be a great idea for cowboy party favors.
So there you have it, an easy stick horse tutorial. So easy even I can do it and a kindergartener can do most of it too) 😉
DIY Stick Horse Tutorial
How to make a stick horse perfect for rodeo days or to ride when dressing up as a cowboy.
Materials
- Mop
- Bandana
- pair of adult socks
- felt
- electrical tape
- googly eyes
- thick twine
- pillow stuffing
- yarn
- ziptie
- black thread
Tools
- glue gun
- large sewing needle
Instructions
- Remove the mop head from the handle and wrap the end with black electrical tape.
- Remove the mop strands from the mop head.
- Cut an equal number of pieces of yarn, the same length of the mop strands.
- Stuff one sock tightly with pillow filling, leaving some space at the end for the mop handle.
- Use the needle to poke yarn strands into the sock head at the back half of the head.
- Place a mop strand across each yarn strand and tie the yarn over the mop strand, then tie the mop strand over the yarn.
- Repeat until you have enough hair, we ended up using 30 pairs of yarn/mop strands.
- Cut small circles from black felt to create nostrils and hot glue them and googly eyes to create the face.
- Doubling black thread, I made one long stitch to create the horse mouth.
- Cut quarter circles out of black felt for the horse ears. Pinch slightly when attaching with a few stitches.
- Push the mop handle into the sock and adjust the filling around it. Use the zip tie to attach to keep the sock attached to the handle. Then cover the zip tie with the handkerchief.
- Create a bridle for the horse using the twine.
More Cowboy Ideas
- Make Sparky, Sheriff Callie‘s Horse
- Rodeo Party Ideas including craft ideas
- Toy Story Coloring Pages
- Easy Woody Costume
This post was originally published February 14, 2014

Jennifer Priest says
Oh these are so cute! And I loved that he helped you make them!!!
Karen says
Thanks! I love finding projects he can help me with – he’s always wants to create something. 🙂