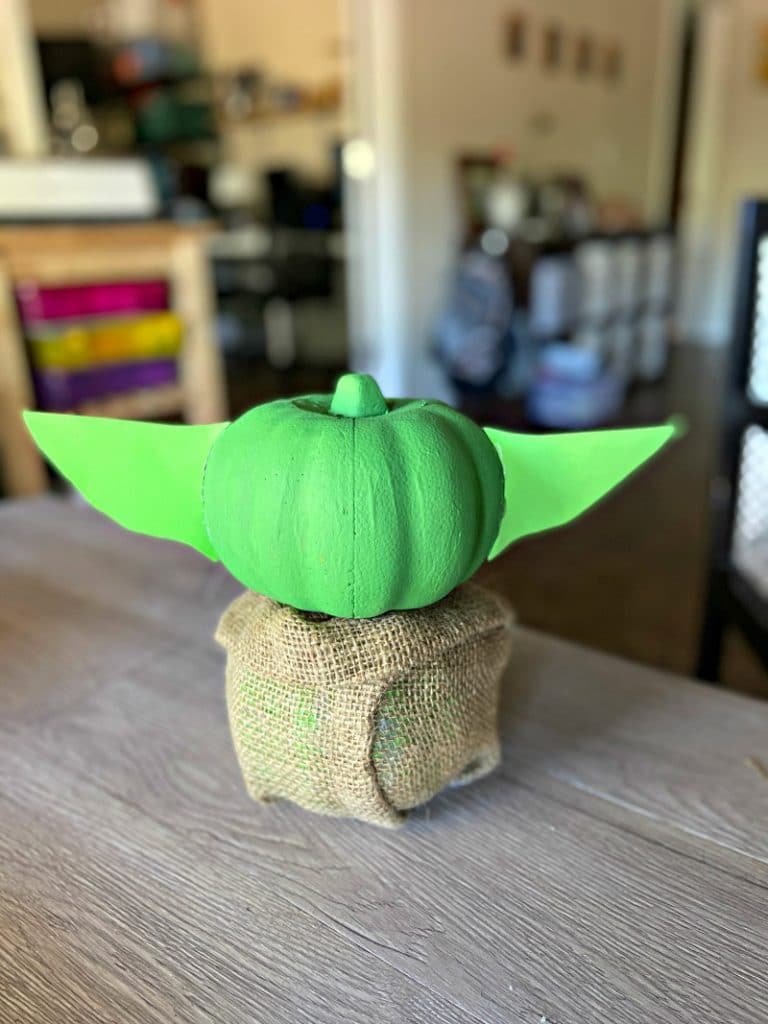
Everyone’s favorite new Star Wars character is the adorable Baby Yoda, or more accurately Grogu as we learned his true name in Season 2 of the Mandalorian. I created a simple painted Baby Yoda pumpkin that every Star Wars fan will want to make!

With all the other Baby Yoda projects I’ve done this year, does it surprise anyone that I wanted to make a no carve Baby Yoda pumpkin?
DIY Baby Yoda Jack-O-Lantern
I am sure other people will be creating more elaborate Baby Yoda pumpkin designs but if you want easy, then you’re in the right place. I really like to think if I can make something, anyone can.
That’s why I opted not to include a face on my pumpkin. Feel free to add a face to your pumpkin but my attempts at it were laughable. If you do want to add a face, you will also need black paint and white paint. 😀
Easy Baby Yoda Pumpkin Tutorial
The gist of my Baby Yoda or ‘The Child’ pumpkin is painting a craft pumpkin and adding the ear and robe details. That’s it! So what do you need for this project?
Well a pumpkin of course. I love the small craft pumpkins from Dollar Tree but any pumpkin will work. Even a real pumpkin, it just won’t last forever like mine will. 🙂

The Child Pumpkin Supplies
Actually you will need two craft pumpkins for this project. One for the body adn one for Baby Yoda’s adorable head!
Besides the pumpkins, you will also need green paint, green craft foam, a hot glue gun, brown fabric for the robe and the ear template. I found brown burlap in my craft stash and loved how it turned out.
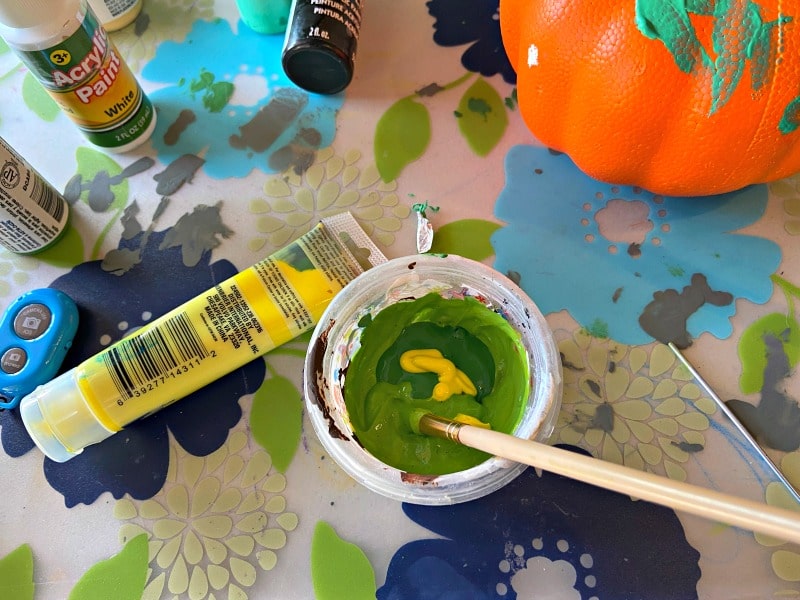
The hardest part of this project is choosing what color green to use. This is a personal decision based on what you think looks best and also what color paint and craft foam you can find. I ended up adding yellow paint to my green paint to adjust the color a little bit.

Baby Yoda Pumpkin
Make Baby Yoda pumpkin craft for Halloween with a few simple materials.
Materials
- 2 Craft Pumpkins
- Green Paint
- Yellow Paint (optional)
- Brown Fabric
- Green Craft Foam
Tools
- Glue Gun
- Scissors
- Ear Template
Instructions
- Start by painting your craft pumpkins green. What color green you choose is up to you. I added yellow paint to my green to adjust the color a bit.

- Print a copy of the Baby Yoda ear template.
- Use the template to trace the Baby Yoda ears out of green craft foam.

- Attach the ears to one of the green pumpkins using a glue gun. You may need to carve the ears a bit to better fit the curve of your own pumpkin.
- Remove the stem off of the 2nd green pumpkin. This allows the head 'pumpkin' to sit on the 2nd pumpkin better.
- Wrap the 2nd pumpkin with your brown fabric, gluing in place. I added a second piece of brown fabric at the top to give the illusion of a collar.

- Glue the pumpkin head on top of the pumpkin body.
Notes
Matching the green paint with the green craft foam can be a challenge, just do the best you can.
Burlap worked great for our robe but I think an old tan towel would work as well.
** Optional ** Add a face to your Baby Yoda pumpkin if you have the patience and skills

You might need to use more than one coat of paint to completely cover up the orange pumpkin. And don’t forget about the back of the pumpkin!

Baby Yoda Season 2
Ok, ok I know ‘The Child’ isn’t really Baby Yoda but that is what most people call him, so that is the easiest way to label all my fun crafts. Speaking of The Child, I can’t wait to see more of his adorableness in season 2 of the Mandalorian on Disney+ starting October 30!!


If you are looking for an easier, less messy option than check out this Baby Yoda push-in pumpkin kits that most kids can do without any adult supervision. There is also lots of cute Baby Yoda Halloween shirts to buy.
Star Wars Halloween Projects
- Mandalorian Pumpkin
- BB-8 Pumpkin
- BB-9E Pumpkin
- Star Wars Halloween Christmas Tree
- DIY Star Wars Costumes
More Baby Yoda Ideas
The pumpkin won’t work with my Star Wars Halloween tree because that is themed to villains and Baby Yoda is too adorable to be a villain.
This post was originally published October 1, 2020.


Leave a Reply